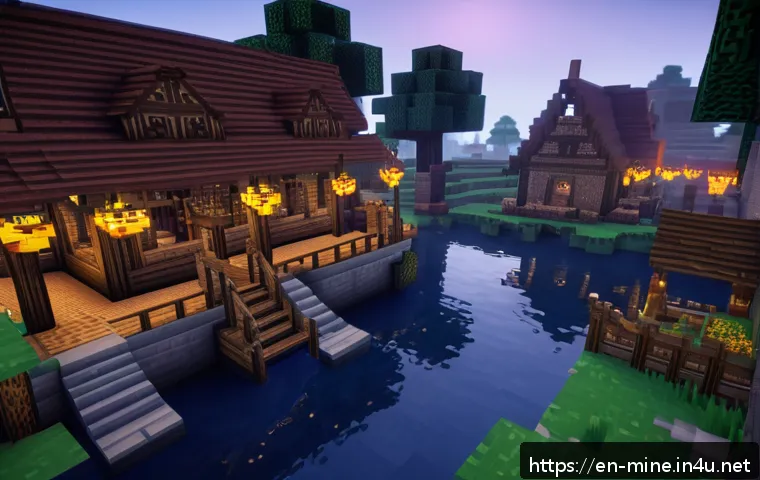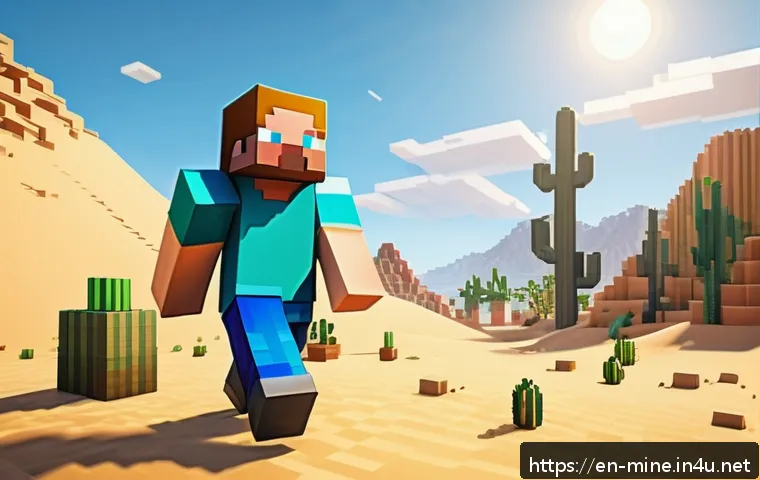
Hey fellow Minecrafters! Ever found yourself building an epic castle or exploring a vast, mysterious cave and thought, “Man, this moment would be even better with my own custom soundtrack?” I totally get that!
The default Minecraft tunes are iconic, sure, but sometimes you just need something a little different to match your mood, your grand vision, or even the chaos of a creeper chase.
I’ve spent countless hours diving deep into the game’s mechanics, and trust me, personalizing your in-game audio isn’t just a cool trick; it’s a game-changer for immersion and self-expression, something that players are increasingly looking for in modern gaming experiences.
It really transforms your world into something uniquely yours, making every adventure feel fresh and tailored. If you’re ready to elevate your Minecraft journey with the perfect soundscape, then you’ve come to the right place.
Let’s explore how to set up your own custom background music and make your world sing, precisely!
Unleashing Your Inner DJ: Why Custom Tracks Transform Your Game
Beyond the Vanilla Vibes: Personalizing Your Play
Okay, let’s be real for a second. We all adore the classic Minecraft music, right? It’s iconic, nostalgic, and instantly recognizable. But after hundreds, maybe thousands, of hours spent punching trees and digging straight down (we all do it!), those familiar melodies can start to blend into the background. It’s like having your favorite song on repeat for a year straight – eventually, you just need a change of pace. I’ve personally found that introducing my own custom music has been nothing short of a revelation. Suddenly, that intense mining session feels like an epic quest with a soaring orchestral score, or building a cozy little cottage gets a gentle, lo-fi backdrop. It’s not just about replacing the old; it’s about amplifying your personal connection to the world you’re creating. Think about it: every block you place, every mob you face, can now have its own unique sonic identity, curated by you. It really takes the sense of ownership and personal expression in your game to a whole new level, something I wholeheartedly recommend.
The Underrated Power of Sound: Boosting Immersion and Mood
You know that feeling when you’re playing a game and the music just perfectly captures the moment? That’s what we’re aiming for here. Sound is an incredibly powerful tool for immersion, and in Minecraft, it’s often an untapped resource. I used to think of music as just background noise, but after experimenting with custom tracks, I realized how much it influences my mood and focus in-game. Creeping through a dark cave with a suspenseful, eerie track playing? Absolutely terrifying and exhilarating! Building a sprawling city while listening to some chill, upbeat electronic music? It makes the grind feel so much more enjoyable and productive. From my own experience, the right soundtrack can completely shift the energy of your play session. It helps you stay engaged longer, makes repetitive tasks feel less monotonous, and can even inspire new building ideas. Plus, when you’ve curated these tracks yourself, there’s an added layer of satisfaction knowing that every beat is precisely what you wanted to hear in that moment. It’s a game-changer for sure, and one that keeps me coming back to my worlds with renewed excitement.
The Great Sound Hunt: Finding Your Perfect In-Game Playlist
Navigating Copyright Seas: Where to Find Legal Beats
Alright, so you’re pumped to get some fresh tunes into your Minecraft world, but hold your horses for a second! The internet is a vast ocean of music, and while it’s tempting to just grab anything that sounds cool, we absolutely need to be mindful of copyright. This isn’t just about being a good citizen; it’s about respecting creators and avoiding potential headaches down the line, especially if you ever plan on streaming or sharing your gameplay. My go-to strategy involves looking for music that is explicitly licensed for free use, often under Creative Commons licenses, or royalty-free music libraries. Websites like Incompetech, Free Music Archive, and YouTube’s Audio Library are fantastic starting points. They offer a huge variety of genres and moods, all cleared for personal use, and often for commercial projects too, which is a huge bonus. Sometimes, indie game soundtracks or artists who release their work for public use are also hidden gems. Always double-check the specific licensing terms for each track – some might require attribution, which is super easy to do by just mentioning the artist in your pack description! It feels really good knowing you’re building an awesome soundscape ethically.
Curating Your Collection: Matching Music to Minecraft Moments
Once you’ve got your legal sound sources lined up, the real fun begins: choosing your tracks! This is where your personal taste truly shines. I always approach this like I’m building a soundtrack for a movie – a movie starring me and my epic Minecraft adventures! Think about the different biomes: what kind of music screams “desert exploration” to you? Or a calming forest stroll? What about intense boss fights or the eerie silence of the Nether? I keep a running list of potential scenarios and then hunt for tracks that evoke those feelings. For instance, I’ve got a specific set of ambient tracks for building in creative mode, a more adventurous playlist for exploration, and even some super chill lo-fi beats for when I’m just farming or organizing my chests. Don’t be afraid to experiment with different genres. I’ve found that unexpected combinations often work the best, like a subtle synthwave track during a night spent underground. My biggest tip here is to listen to the music and imagine yourself playing Minecraft in that exact moment. If it clicks, you’ve found a winner. This creative process is one of the most rewarding parts of customizing your game.
Crafting Your Sonic Resource Pack: A Step-by-Step Adventure
Laying the Groundwork: Setting Up Your Folder Structure
Alright, let’s get our hands dirty with the technical bits – but trust me, it’s not as scary as it sounds! The core of custom music in Minecraft revolves around resource packs. Think of them as special folders that tell the game, “Hey, use these files instead of your default ones!” First things first, you’ll want to create a new folder on your desktop or somewhere easily accessible. Name it something descriptive, like “MyCustomMusicPack.” Inside this folder, you absolutely need two things to start: a ‘pack.mcmeta’ file and an ‘assets’ folder. The ‘pack.mcmeta’ file is tiny but mighty; it tells Minecraft what your pack is, what version it’s for, and its description. I usually just copy one from an existing resource pack and modify it, making sure the “pack_format” number matches my current Minecraft version (you can quickly look up the correct format for your version online). Next, open your ‘assets’ folder. Inside ‘assets’, you’ll create another folder called ‘minecraft’, and inside that, yet another called ‘sounds’. This nested structure is crucial – it’s how Minecraft expects to find its audio files. It might seem like a lot of folders, but once you do it once, it becomes second nature, and you’ll feel like a true modding wizard!
The Magic JSON File: Telling Minecraft What to Play
Now that we have our basic folder structure, we need to tell Minecraft *which* sounds to replace and *with what*. This is where the ‘sounds.json’ file comes into play, located inside your ‘minecraft’ folder (the one inside ‘assets’). This file is basically your pack’s instruction manual for audio. It’s a bit of code, but don’t panic – it’s mostly copy-pasting and careful editing. Inside ‘sounds.json’, you’ll list each default Minecraft sound event you want to replace and point it to your custom audio file. For example, if you want to replace the default creative mode music, you’d find its entry in a default ‘sounds.json’ (you can extract this from the game’s JAR file or find examples online) and then change the file path to point to your custom track. The key is to match the original sound event name perfectly. I usually start with a simple text editor and painstakingly go through, adding my entries. It might seem tedious, but when you hear your custom track finally play in-game, it’s incredibly satisfying. Remember to use a JSON validator online if you’re ever unsure about your formatting; a tiny misplaced comma can break the whole thing!
Diving into the Directories: Organizing Your Audio Files
Mimicking the Masters: Understanding Minecraft’s Audio Paths
Once you’ve got your ‘sounds.json’ ready, the next step is actually putting your custom audio files in the right place. Minecraft is very particular about where it expects to find its sounds, and if you don’t follow its internal logic, your beautiful new tracks will just sit there silently. The ‘sounds’ folder we created earlier (inside ‘assets/minecraft’) is your main hub. Inside this ‘sounds’ folder, you’ll typically create subfolders that mirror Minecraft’s own structure. For instance, if you’re replacing music, you’d likely put your custom tracks into a folder like ‘music/game’. If you’re replacing specific sound effects, you’d follow their existing paths, such as ‘mob/skeleton/step’ for a skeleton’s footstep. My advice is to peek into the vanilla Minecraft resource pack (you can often find extracted versions online) to see exactly how their sounds are organized. This gives you a perfect blueprint to follow. I’ve found that sticking as closely as possible to the original game’s directory structure drastically reduces troubleshooting time. It’s all about helping the game find your files without a hitch. This step truly feels like a puzzle, but a fun one where the pieces are your favorite songs!
File Formats and Naming: Getting Everything Just Right
Beyond just the folder structure, the actual audio files themselves need to meet certain criteria. Minecraft primarily uses OGG Vorbis files (.ogg), though some versions might support others. My personal rule of thumb is always to convert my MP3s or WAVs to OGG format. There are tons of free online converters, or you can use audio editing software like Audacity for this. Make sure the file names you use in your ‘sounds.json’ exactly match the actual file names in your folders, including the ‘.ogg’ extension. Even a tiny typo, like “mytrack.ogg” versus “my_track.ogg,” will prevent the game from finding it. I learned this the hard way after pulling my hair out for an hour over a single underscore! For best results, keep your file names concise and use only lowercase letters and underscores – avoid spaces or special characters. It just makes everything smoother. Also, think about the volume levels. You don’t want your custom music blasting everyone’s ears out or being barely audible. A quick test in-game helps you adjust the gain if needed. Here’s a quick reference for common paths:
| Category | Typical Minecraft Path Example | Your Custom Folder Suggestion |
|---|---|---|
| Game Music | assets/minecraft/sounds/music/game/calm1.ogg |
assets/minecraft/sounds/music/game/your_calm_track.ogg |
| Creative Music | assets/minecraft/sounds/music/menu/creative1.ogg |
assets/minecraft/sounds/music/menu/your_creative_track.ogg |
| Cave Sounds | assets/minecraft/sounds/ambient/cave/cave1.ogg |
assets/minecraft/sounds/ambient/cave/your_cave_sound.ogg |
| Disc Music | assets/minecraft/sounds/records/13.ogg |
assets/minecraft/sounds/records/your_disc_track.ogg |
Bringing it All Together: Installing Your Custom Soundscape
Activating Your Pack: Getting Your Music into the Game
You’ve done the hard work of organizing your folders, writing your JSON, and preparing your audio files. Now comes the moment of truth: getting your custom resource pack into Minecraft! This part is actually pretty straightforward. First, you need to compress your main pack folder (the one containing ‘pack.mcmeta’ and ‘assets’) into a .zip file. Make sure you zip the *contents* of the folder, not the folder itself, or Minecraft might not recognize it. Once you have your .zip file, open Minecraft, go to “Options,” then “Resource Packs.” You’ll see an “Open Pack Folder” button at the bottom. Click that, and it will open the folder where Minecraft looks for resource packs. Simply drag and drop your newly created .zip file into this folder. Close the folder, and you should now see your custom music pack listed on the left side of the Resource Packs screen in Minecraft. Move it over to the “Selected Resource Packs” column on the right. Make sure it’s at the top of your list if you have other packs, especially if those packs also modify sounds, to ensure your custom music takes priority. Click “Done,” and Minecraft will reload. I remember the first time I heard my own music in-game after doing all this – it was such a thrill, like opening a present you made yourself!
In-Game Check-Up: Making Sure Your Sounds Sing
After activating your pack, jump straight into a world and start playing! This is the exciting part where you get to hear all your hard work come to life. Pay close attention to the areas where you’ve replaced music. Did you replace the creative mode music? Hop into a creative world. Did you swap out some cave sounds? Head into a dark cavern. Listen carefully for your custom tracks. If you hear them, fantastic! If you don’t, don’t fret – it’s super common for things not to work perfectly on the first try. I’ve been there more times than I can count. Sometimes, it’s just a matter of adjusting your game’s music and sound effect volume settings to make sure your new tracks aren’t getting drowned out. I usually turn off the vanilla music volume completely if I want my custom tracks to be the sole focus. Also, try restarting Minecraft completely; sometimes the game needs a fresh boot to fully register new resource packs. Don’t be afraid to poke around and really listen. The goal is a seamless, custom audio experience that feels perfectly integrated into your Minecraft adventure, and a little bit of in-game testing will confirm you’ve hit that sweet spot.
Troubleshooting Tunes: What to Do When the Music Stops
Common Hiccups: Pointers for When Things Go Quiet
Even for experienced players like myself, custom resource packs can sometimes throw a curveball. If your music isn’t playing, or you’re hearing a mix of old and new, it’s usually one of a few common culprits. The absolute first thing I check is my ‘pack.mcmeta’ file for the ‘pack_format’ number. Minecraft updates frequently, and if your format number is outdated, your pack won’t load correctly. A quick Google search for “Minecraft pack format version [your game version]” will set you straight. Next, I meticulously go through my ‘sounds.json’. JSON is very finicky about commas and brackets. One missing comma, or an extra one, and the whole file becomes invalid. I often use an online JSON validator to paste my code and quickly identify any syntax errors. It’s a lifesaver, trust me! Another frequent issue is incorrect file paths or typos in the file names. Double-check that the paths in your ‘sounds.json’ exactly match the actual folder structure and file names, including capitalization and extensions. Minecraft is case-sensitive! I’ve spent frustrating hours only to realize I typed ‘Music’ instead of ‘music’ in a path. These small details are often the biggest troublemakers when trying to get your custom tunes to play.
My Go-To Fixes: Debugging Like a Pro
When the usual suspects don’t pan out, I resort to a few more advanced debugging techniques. First, I try isolating the problem. Create a super minimalist resource pack with just one custom sound to replace a very common sound event (like the ‘click’ sound when you navigate menus). If that works, you know your basic pack structure is correct, and the issue lies within your ‘sounds.json’ or the specific music files you’re trying to replace. Another trick I use is comparing my ‘sounds.json’ to a vanilla ‘sounds.json’ extracted from the game. This often reveals discrepancies in event names or structures that I might have overlooked. Sometimes, simply having another resource pack active above yours (especially if it also modifies sounds) can override your custom music. Make sure your pack is at the very top of the “Selected Resource Packs” list. And if all else fails, don’t underestimate the power of a fresh start: delete your pack from the resource pack folder, restart Minecraft, and then re-add it. Sometimes, the game just needs a full reset to properly register everything. I remember one time, my music wasn’t playing, and it turned out my audio files were corrupted! Re-converting them fixed it immediately. Persistence is key, and with these tips, you’ll have your soundtrack humming along in no time.
Advanced Audioscapes: Taking Your Immersion to the Next Level
Biome-Specific Ballads: Tailoring Music to Locations
Once you’ve mastered the basics of replacing general background music, it’s time to truly elevate your game with biome-specific tracks. This is where the magic of immersion really happens, and it’s one of my favorite custom touches. Imagine stepping from a lush forest into a snowy tundra, and the music seamlessly shifts from a gentle, leafy tune to something more crisp and airy. Minecraft’s sound events actually allow for this! You can define different music tracks to play when you’re in specific biomes. This involves a bit more tinkering with the ‘sounds.json’ file, often utilizing conditional statements or leveraging existing biome-specific sound events if they exist. You’ll need to identify the internal names for each biome you want to target (a quick wiki search usually helps here). I love setting up a distinct, melancholic tune for the deep dark caves or a vibrant, tropical rhythm for a jungle biome. It truly makes exploring feel like an epic journey through diverse landscapes, each with its own sonic personality. It’s a more advanced technique, for sure, but the payoff in terms of immersion is absolutely incredible, and your world feels so much more alive and responsive to your explorations. It feels like the game is truly listening to where you are.
Event-Driven Echos: Soundtracks for Special Occasions
Beyond just biomes, you can also get super creative with event-driven music. Think about special moments in Minecraft: spawning in, defeating a boss, or even just the transition from day to night. With careful editing of your ‘sounds.json’, you can assign custom music to these specific game events. For instance, I’ve set up a dramatic, short fanfare that plays whenever I defeat the Ender Dragon, giving that epic achievement an extra layer of triumph. Or, you could have a particular “dungeon theme” kick in when you enter a specific structure, adding a huge dose of atmosphere. This really pushes the boundaries of personalization. It’s about creating a dynamic soundscape that reacts to your actions and the world around you, rather than just playing a static loop. This might require digging a bit deeper into Minecraft’s internal sound events, possibly extracting the default ‘sounds.json’ for your game version and carefully examining its structure. But the feeling of having your own curated soundtrack responding to every key moment? That’s what I call truly next-level Minecrafting, making every session feel like a unique, cinematic experience. It truly transforms the game into a personalized masterpiece, and it’s a journey I encourage everyone to embark on for maximum enjoyment.
Wrapping Things Up
So, there you have it, fellow crafters and adventurers! We’ve journeyed through the ins and outs of customizing your Minecraft soundscape, from hunting down those perfect, legal beats to meticulously crafting your very own resource pack. It might seem like a bit of a trek at first, with all the folders and JSON files, but trust me, the payoff is absolutely enormous. I can’t even count how many times a carefully chosen track has transformed a mundane mining trip into an epic saga or made a cozy building session feel even more relaxing. This isn’t just about changing the music; it’s about reclaiming a piece of your game, making it uniquely, wonderfully yours. Every block, every adventure, every quiet moment in your world can now resonate with the exact emotions and vibes you want to feel. It’s an act of personal expression that deepens your connection to the game in a way vanilla music just can’t quite match. So, go on, give it a try – unleash your inner DJ and let your Minecraft world sing your song!
Handy Info You’ll Be Glad You Knew
1. Always remember the file format! While you might have your favorite tunes in MP3 or WAV, Minecraft resource packs almost exclusively use OGG Vorbis for audio. Trust me, I’ve wasted hours troubleshooting only to realize my files were in the wrong format. There are plenty of free online converters and audio editing tools like Audacity that make this conversion super easy. Just make sure to convert, not just rename, the file, and keep the file names simple with lowercase letters and underscores to avoid any compatibility headaches with the game’s file parsing. It makes the whole process smoother and saves you a ton of frustration.
2. Keep a keen eye on your number in ! Minecraft updates pretty frequently, and with each major update, the version number can change. If your file has an outdated format number, your entire resource pack simply won’t load correctly, or at all. I learned this the hard way when a new game version dropped and my beloved custom sounds suddenly went silent. Always double-check the current for your specific Minecraft Java Edition version with a quick online search before activating your pack. It’s a small detail, but it’s critically important for getting your creations recognized by the game.
3. Utilize a JSON validator for your file. This tip is an absolute lifesaver. The file is incredibly picky about its syntax – one missing comma, an extra bracket, or a tiny typo can render the entire file invalid, leading to no custom sounds playing in-game. Before you even think about dropping your pack into Minecraft, paste the contents of your into an online JSON validator. These tools quickly pinpoint any syntax errors, saving you countless hours of frustrating, manual debugging. It’s a simple step that acts as a powerful preventative measure against the most common sound-pack issues.
4. Prioritize royalty-free or Creative Commons licensed music. When curating your soundtrack, it’s vital to respect copyright laws. While it might be tempting to use any song you like, opting for royalty-free music or tracks released under a Creative Commons license ensures you’re doing things legally and ethically. Websites like Epidemic Sound, Uppbeat, Bensound, and YouTube’s Audio Library offer vast selections of music cleared for use in your projects, often even for streaming or sharing gameplay. Always check the specific license terms, as some may require attribution. This way, you can enjoy your custom soundscape without any worries about copyright infringement.
5. Resource pack order matters! If you’re running multiple resource packs, the order in which they’re loaded in Minecraft can drastically affect which sounds (or textures, or models) take priority. If your custom music pack isn’t working, make sure it’s placed at the very top of your “Selected Resource Packs” list in the Minecraft options menu. This ensures that your custom files override any conflicting sounds from other packs or even the vanilla game. It’s a common oversight, but a quick adjustment here can often resolve mysterious sound issues and ensure your curated tunes are the ones you actually hear.
Key Takeaways
At its core, customizing your Minecraft music isn’t just a technical tweak; it’s a profound way to personalize your gaming experience and boost immersion. By diving into resource packs, organizing your audio files, and carefully editing the file, you unlock a new dimension of creativity. Remember to always prioritize legal, royalty-free music, meticulously check your file formats and paths, and pay attention to your number – these small details make all the difference in a smooth setup. Don’t be discouraged by initial hiccups; troubleshooting is part of the learning curve, and the satisfaction of hearing your own unique soundtrack filling your Minecraft world is truly unparalleled. This journey empowers you to be the master of your game’s atmosphere, transforming every session into an adventure perfectly scored by you. It’s an investment in your personal enjoyment, adding layers of depth and feeling that only a custom touch can provide.
Frequently Asked Questions (FAQ) 📖
Q: How do I actually get my favorite tunes into Minecraft as background music? It sounds a bit complicated!
A: You know, when I first looked into this, I thought it would be a huge headache, but it’s actually pretty manageable for Java Edition players! The secret sauce is creating a custom “resource pack.” This is basically a folder where you put all your personalized stuff, including your awesome music.
First things first, you’ll need to locate your Minecraft installation folder, usually in %appdata%\.minecraft on Windows. Inside, you’ll find a “resourcepacks” folder where your custom pack will live.
Now, for the magic! You’ll create a new folder for your resource pack and then, critically, set up the right internal structure: .
This is where Minecraft looks for its ambient background music. You’ll also need a ‘pack.mcmeta’ file at the root of your resource pack folder, which just tells Minecraft a little about your pack, like its name and what version it’s for.
Then comes the fun part: picking your music! You’ll convert your chosen songs into the .ogg format, which is what Minecraft uses. I personally love using a free tool called Audacity for this; it makes converting and even editing super straightforward.
Finally, you’ll drop your .ogg music files into that folder, making sure they’re named appropriately if you’re replacing specific tracks. After that, zip up your resource pack folder (making sure the ‘assets’ folder and ‘pack.mcmeta’ are at the root of the zip file, not inside another folder), pop it into the game’s “resourcepacks” folder, activate it in your Minecraft options, and boom!
You’ve got your custom soundscape ready to go. It’s such a rewarding feeling the first time your own music starts playing!
Q: What kind of music files can I use, and are there any specific things I need to know about the format?
A: This is a super important question, and I learned a few things the hard way on this one! Minecraft Java Edition is pretty particular when it comes to audio files.
It exclusively uses the .ogg Vorbis format. So, if you’ve got your favorite tracks as MP3s, WAVs, or anything else, you absolutely have to convert them to .ogg.
As I mentioned before, Audacity is my go-to for this. It’s free, pretty user-friendly, and handles the conversion to .ogg Vorbis perfectly. Just remember to select “Export as Ogg Vorbis” from the File menu.
Another thing I’ve noticed, especially with ambient background music, is that the game’s sound engine has its quirks. Some users have reported that replacing music files requires the new audio to be the exact same length as the original track it’s replacing, or at least shorter.
While I haven’t seen this consistently break things for all custom music, it’s a good practice to keep in mind, especially if you encounter issues. For me, I usually try to match the length closely or use slightly shorter tracks to avoid any weird cut-offs.
Also, make sure your audio is set to mono when converting, as this can sometimes prevent playback issues! When it comes to where to get your music, always be mindful of copyright!
Stick to royalty-free music from sites like Pixabay, or use music you’ve created yourself. There are tons of fantastic options out there that won’t land you in hot water.
Q: My custom music isn’t playing, or it’s cutting out unexpectedly. What gives?
A: Oh, I totally feel your pain on this one! There’s nothing more frustrating than putting in the effort only for your custom tracks to stay silent. I’ve definitely had my share of head-scratching moments.
First, and this might sound silly, but double-check your in-game audio settings! Make sure “Music” volume is turned up in Minecraft’s options. Sometimes, a quick F3 + T or F3 + S (it varies by version and system) can refresh your sound engine, which has magically fixed things for me more than once.
If that doesn’t work, let’s get into the nitty-gritty of your resource pack. The most common culprit is usually the folder structure or file naming. Minecraft is incredibly picky.
Ensure your folders are exactly (for general background music) and that your .ogg files are placed there. Also, check that you correctly named your music files if you’re replacing specific vanilla tracks – they need to match the original names precisely, minus the extension, of course.
For custom music discs, the path is usually , and you’ll need a file to define these new events and their paths.
Another thing to watch out for: did you accidentally zip your resource pack folder inside another folder? When you create the .zip file for your resource pack, the folder and the file should be directly inside that .zip, not nested one layer deeper.
If the pack shows up in red in your resource pack menu, it often means there’s a version mismatch or a fundamental structural error, so double-check your ‘s number against your Minecraft version.
If you’re still stumped, sometimes completely reinstalling Minecraft (after backing up your worlds, of course!) can clear up deeper audio issues, but that’s a last resort!
Keep at it, and you’ll get your game singing in no time!